If you’ve ever felt discouraged by gluten free bread recipes that are overly complicated, dry, or full of strange, unpronounceable ingredients, you’re not alone. We’ve all been there, staring at a dense, heavy loaf that tastes more like a brick than breakfast. But here is the good news: Baking your own artisan gluten free sourdough bread doesn’t have to be stressful.
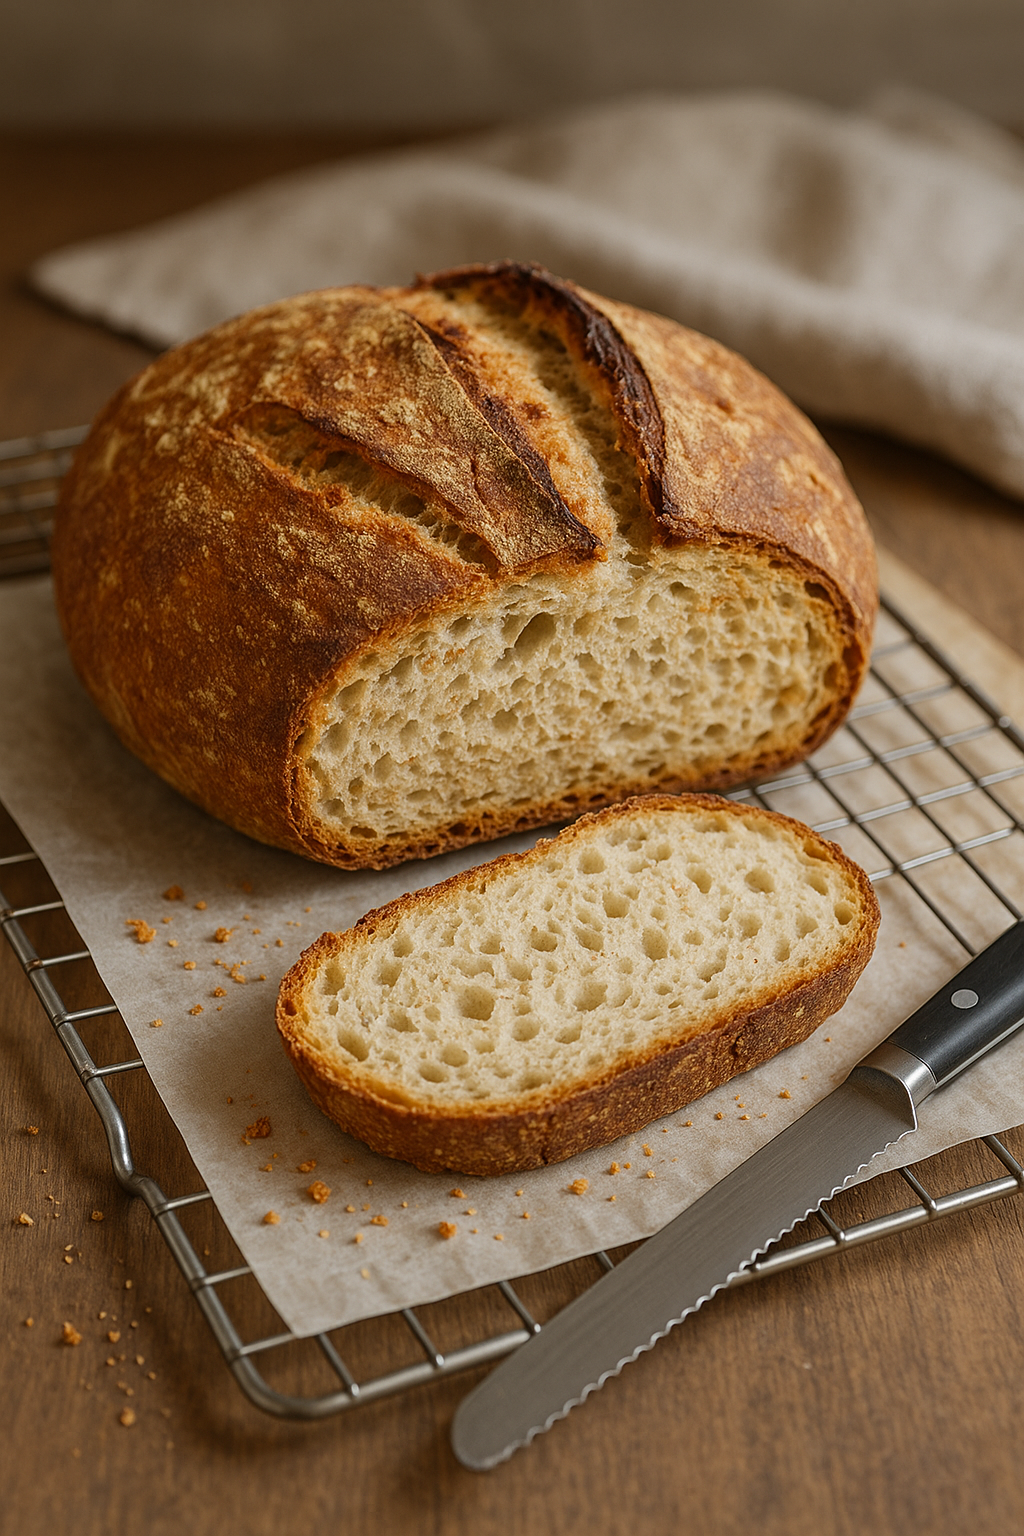
This recipe is as simple as it gets. We are stripping away the complexity to focus on just 4 essential ingredients. The result? A loaf with that classic tangy sourdough flavor, a golden, shattered glass crust, and a soft, airy center that actually bends without breaking.
When I first started my gluten free journey in Morocco, I spent a small fortune trying to find a decent loaf of bread. Everything was either frozen solid or crumbly like sand. I decided to try sourdough, but the recipes I found online looked like a science experiment—12 different flours and a schedule that required waking up at 3:00 AM! I almost gave up. It wasn’t until I simplified everything down to these 4 basics that I finally pulled a steaming, crusty loaf out of the oven that made my kitchen smell like a real Parisian bakery. If I can do it, you absolutely can too.
Why This is the Perfect gluten free sourdough bread
Whether you’re a total beginner or a seasoned baker looking for a reliable “gluten free sourdough bread,” this recipe is designed to be your go-to. Here is why you’ll love it:
- Only 4 Ingredients: No long lists of specialty binders or expensive additives.
- A Clear Baking Schedule: I’ve mapped out exactly when to feed, mix, and bake so you can fit this into a busy life.
- No Specialty Flours Needed: We use a simple, high-quality blend that does the heavy lifting for you.
- The Perfect Texture: You finally get that “soft center” that is perfect for sandwiches, avocado toast, or dipping into a warm bowl of soup.
")
Ingredients You’ll Need to make Gluten Free Sourdough Bread :
- 200 g un-fed Gluten Free Sourdough Starter (made with a 1:1 gluten free flour blend)
- 420 g Bob’s Red Mill 1:1 Gluten Free Baking Flour (or another blend with xanthan gum included)
- 300 g bottled or filtered water (room temperature or cold)
- 12 g fine sea salt
Tip: If your water is chemically treated, boil and cool it before using. A natural, clean water source helps your starter thrive.
Step by Step: How to Make Gluten Free Sourdough Bread
Baking gluten free sourdough bread is a marathon, not a sprint, but I’ve simplified the process into a manageable 2-day schedule. This timing ensures your bread develops that signature tang and perfect structure without you having to babysit it all day.
Day 1: Mixing & The Long Rise (The Bulk Fermentation)
Around 12:00 PM
- Mix the Dough: In the bowl of a stand mixer, combine your unfed sourdough starter, gluten-free flour, water, and salt.
- The Hook Method: Use the dough hook attachment and mix until the dough pulls together into a cohesive ball. Make sure there are no pockets of dry flour hiding at the bottom!
- The First Rise: Shape the dough into a smooth ball and place it in a glass bowl that has been lightly oiled and floured. Cover it loosely with a damp cloth or plastic wrap and leave it in a warm, draft-free spot for 6–10 hours.
When I first started, I used to panic because my gluten free dough didn’t “double” in size like wheat dough does. Don’t worry! If it looks slightly puffed and feels lighter to the touch, it’s working. Gluten free sourdough relies more on the internal fermentation than a massive vertical rise at this stage.
Around 8:00 PM
- The Cold Retard: Move your dough (either in the bowl or a floured banneton basket) into the refrigerator. Let it rest for 12 hours. This cold sleep is what develops that complex, professional flavor and makes the dough easier to handle for scoring.
Day 2: The Bake (The Magic Moment) gluten free sourdough bread :
Around 8:00 AM
- The “Sauna” Prep: Place your Dutch oven on the center rack and preheat your oven to 500°F (260°C) for at least 30 minutes. You want that pot screaming hot!
- Shape & Score: Turn the cold dough out onto parchment paper. Gently reshape it into a tight ball and coat it with a thin layer of flour.
- The Signature Slash: Use a sharp knife or bread lame to slash the top at least 1 inch deep. This gives the steam a place to escape so your bread doesn’t “explode” out the sides.
The Baking Process
- The Ice Cube Trick: Carefully lower the dough into the hot Dutch oven. Drop 2 ice cubes between the parchment and the pot wall before quickly closing the lid. This creates a burst of steam for a thinner, crispier crust.
- Step 1: Reduce the oven to 450°F (232°C) and bake covered for 40 minutes.
- Step 2: Remove the lid, lower the temp to 425°F (218°C), and bake for another 40 minutes.
The Final Test: Cooling & Slicing
- The Sound of Success: Tap the bottom of the loaf; it should sound completely hollow. If you have a thermometer, the internal temperature should reach 210°F (99°C).
- The Hardest Part: Transfer to a wire rack and cool completely.
Pro-Tip & Personal Warning: I know the smell is irresistible, but do not slice it while it’s hot! Gluten-free bread is still “setting” its structure as it cools. If you cut it too early, the inside will turn gummy and damp. Patience is the secret ingredient here!
Pro Tips for Gluten Free Sourdough Bread Success
Sourdough is as much about the “feel” as it is about the recipe. Because we aren’t working with traditional wheat gluten, we have to play by a different set of rules. Here are my top pro-tips to ensure your loaf looks like it came from a high-end artisan bakery.
1. The Power of Xanthan Gum
In the world of gluten free sourdough bread, structure is everything.
- The Tip: Always stick to a high-quality flour blend that already contains xanthan gum. This ingredient acts as the “scaffolding” for your gluten free sourdough bread, providing the elasticity needed to hold onto those beautiful air bubbles created by your starter.
- The Result: Without it, your gluten free sourdough bread will likely spread out flat like a pancake instead of rising tall and proud.
2. Respect the Fermentation (Don’t Watch the Clock!)
- The Tip: Do not rush the fermentation process. Unlike wheat based sourdough, gluten free dough usually won’t double in size during the bulk rise.
- The Personal Experience: I used to wait for hours, staring at my bowl and thinking my starter had “died” because the dough wasn’t exploding over the rim. I eventually learned that if the dough feels lighter, looks slightly puffed, and smells pleasantly tangy, it’s ready for the fridge. Trust the fermentation, not just the volume!
3. The “Ice Cube” Secret for a Crackly Crust
- The Tip: When you drop your gluten free sourdough bread into the Dutch oven, toss 2 ice cubes between the parchment paper and the side of the pot just before slamming the lid shut.
- The Result: This creates an immediate burst of steam inside the sealed pot. This moisture keeps the surface of the dough soft for those first few minutes, allowing it to expand fully (the “oven spring”) and creating that shatteringly crisp, golden-brown crust we all crave.
4. The “No-Slice” Zone
- The Tip: Be incredibly patient when cooling. You must let the loaf cool completely on a wire rack—usually at least 2 to 4 hours—before even thinking about slicing it.
- The Warning: I know the aroma is heaven, but cutting into a hot gluten free sourdough bread is the fastest way to ruin it. The steam is still working to set the crumb structure inside. If you cut it early, the moisture will collapse, and you’ll end up with a gummy, wet texture instead of a soft, airy center.
FAQs : Gluten Free Sourdough Bread :
Can I freeze this gluten free sourdough bread?
Yes. Slice it first, wrap tightly, and store in the freezer for up to 3 months. Toast straight from frozen.
What if my gluten free sourdough bread didn’t rise?
Check your starter, it may not be active enough. Make sure it’s bubbly and has been recently fed before baking.
Can I use a different flour blend?
Yes, but results vary. Always choose one that already includes xanthan gum, or add your own.
Can I use a different flour for the starter? I recommend feeding your starter with the same flour you use for the bread to keep the yeast “happy” and consistent.
What if my crust isn’t getting dark enough? If your gluten free sourdough bread looks pale after the lid comes off, you can leave it in for an extra 5–10 minutes during the “uncovered” phase. Every oven in the USA is a little different, so don’t be afraid to let it get a deep, mahogany brown!
See more gluten free baking recipes :
Easy Gluten Free Bread Recipe (Soft, No Kneading, Beginner Friendly)
Easy Gluten Free Focaccia Bread (Soft, Olive Oil & Foolproof)
Soft & Easy Gluten Free Bread Recipe | 7 Simple Steps
Essential Baker’s Notes for the Perfect Gluten Free Sourdough Bread
To ensure your sourdough journey is a success, keep these “golden rules” in your back pocket. These are the small details that separate a beginner’s loaf from a professional, artisan style masterpiece.
1. The Flour & Water Quality
- Structure is Key: Always use a flour blend that has xanthan gum included. Since we don’t have gluten, xanthan gum provides the “stretch” and structure needed to trap air bubbles.
- Starter Safety: If you live in an area with chlorinated tap water (common in many USA cities), your starter might struggle. Chlorine can actually weaken or kill the natural yeast.
- The Fix: Always use filtered water or water that has been boiled and cooled. This keeps your “wild yeast” strong and active.
2. Managing Your Expectations: The “Rise”
I remember my first few loaves—I kept waiting for that massive, fluffy double-in-size rise I saw in YouTube videos of wheat bread. I thought my dough was a failure because it only puffed up a little. I eventually learned that Gluten Free Sourdough Bread won’t double in size like wheat dough. If you see a slight rise and the dough feels “airy” when you touch it, you are exactly where you need to be!
3. The Cooling & Storage Strategy
- The Patience Rule: I cannot stress this enough—be patient when cooling. If you slice that bread while it’s still warm, the steam trapped inside will turn the crumb gummy and damp. Let it cool until it feels room temperature to the touch.
- Best Storage Hack: Gluten-free sourdough is best enjoyed fresh, but it stores beautifully in the freezer.
- Pro-Tip: Once cooled, slice the entire loaf, wrap the slices tightly, and store them in the freezer. When you’re ready for a snack, just pop a slice straight from the freezer into the toaster. It comes out tasting like it was just baked!
Final Thoughts
This 4 ingredient gluten free sourdough bread recipe proves that baking doesn’t have to be complicated. With a little patience and the right flour blend, you’ll enjoy a crusty, tangy loaf that rivals traditional sourdough.
If you try this recipe, leave a comment below or tag your bread photos I’d love to see your creations! and tag as on instagram