Tired of gluten free biscuits that turn out more like dense hockey pucks or dry, crumbly rocks? You aren’t alone. For many of us, the quest for a soft, fluffy biscuit that can actually hold a swipe of honey or a ladle of gravy has been a long one. Most store bought versions are disappointing, and many recipes require a pantry full of specialty flours.
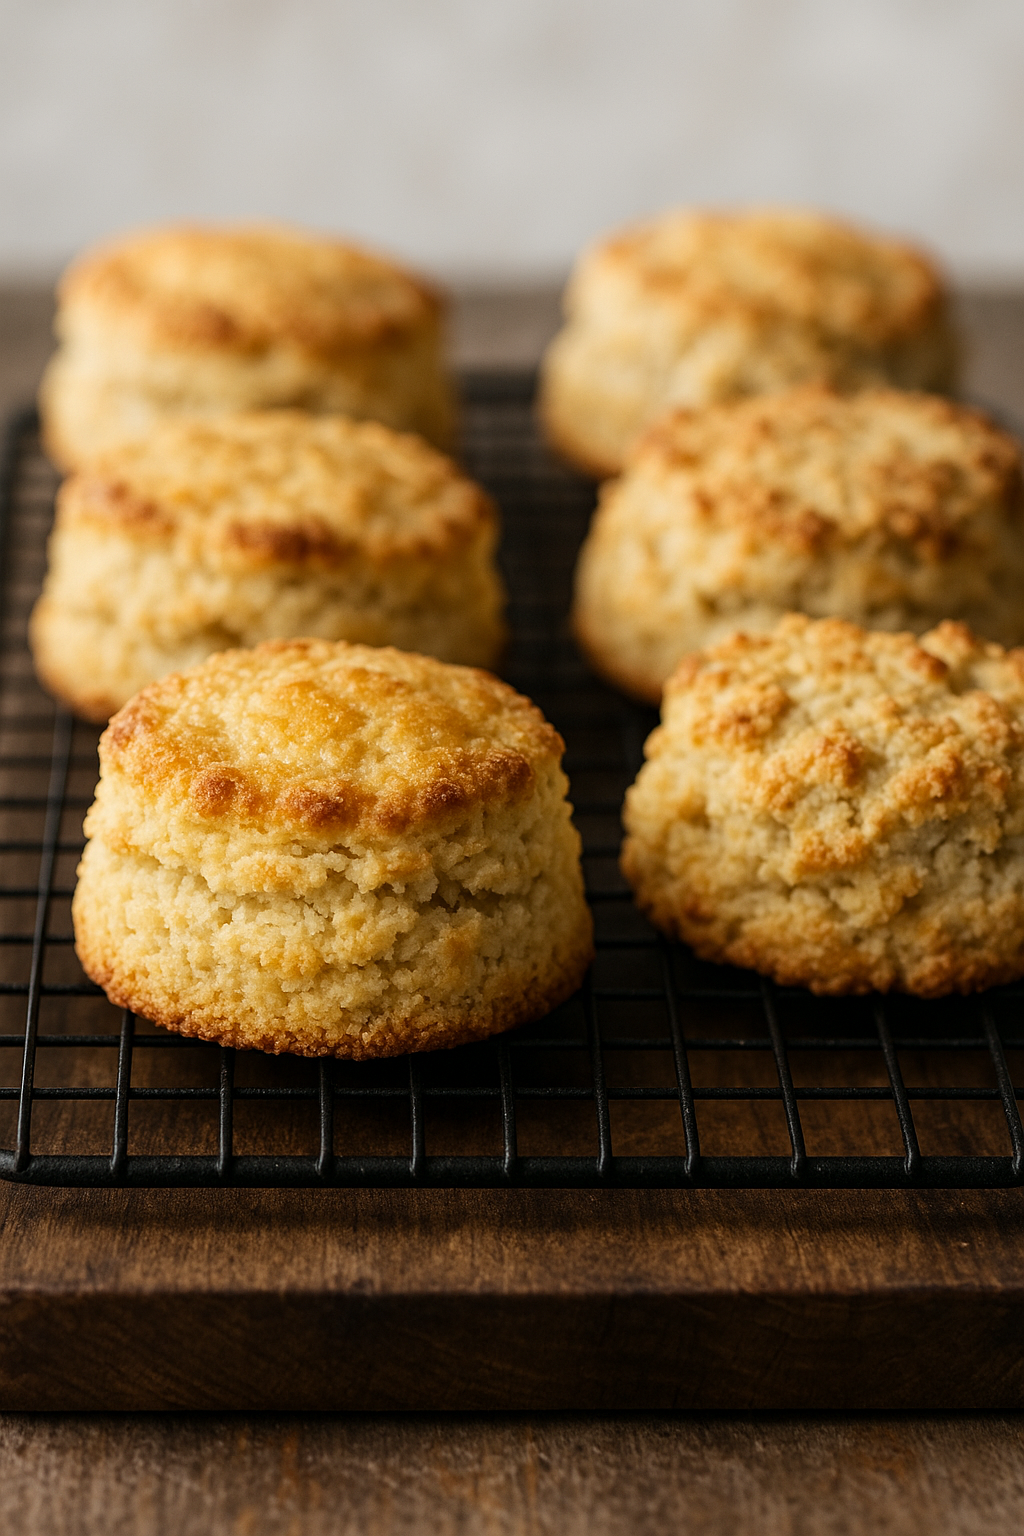
The good news? This easy gluten free biscuits recipe changes everything. We’re talking about golden, buttery tops, flaky layers, and a center that is so soft it practically melts in your mouth all made with simple ingredients you likely already have. No weird flours required!
Growing up, biscuits were a weekend tradition. When I had to go gluten free, I missed that specific “buttery crunch” more than anything. I tried at least a dozen recipes that promised “fluffy” results but ended up being sandy and bland. It wasn’t until I figured out the secret of cold butter and high heat that I finally got that rise I was looking for. Now, my “gluten eating” friends request these specifically for brunch they can’t even tell the difference!

Why You’ll Love These Gluten Free Biscuits :
Versatile: Perfect for biscuits and gravy, breakfast sandwiches, or just a simple side of butter and jam.
Bakery Style Rise: Thanks to a few simple folding techniques, you’ll get those beautiful, flaky layers every time.
Simple Ingredients: We use a reliable 1-to-1 gluten-free flour blend so you don’t have to play chemist in the kitchen.
Naturally Moist: These stay soft even after they cool down, unlike many GF bakes that turn hard after 20 minutes.
Ingredients You’ll Need for Gluten Free Biscuits :
- 2 cups gluten-free all-purpose flour (recommended: Pillsbury Gluten Free; see notes for alternatives)
- ½ teaspoon xanthan gum (leave out if your flour blend already contains it)
- 1 tablespoon gluten-free baking powder
- 1 teaspoon salt
- 2 tablespoons granulated sugar
- 1 cup buttermilk
- DIY Buttermilk: Add 1 tablespoon white vinegar or lemon juice to milk, stir, and let rest for 5–10 minutes in the fridge.
- Dairy-Free Option: Use almond, cashew, or coconut milk + vinegar for dairy-free buttermilk.
- DIY Buttermilk: Add 1 tablespoon white vinegar or lemon juice to milk, stir, and let rest for 5–10 minutes in the fridge.
- 6 tablespoons unsalted butter, cold (Vegan/Dairy-Free Option: Smart Balance, Earth Balance, or shortening)
- 1 large egg (Egg-Free Option: Bob’s Red Mill Egg Replacer)
- 2 tablespoons gluten-free all-purpose flour (for dusting dough when shaping)
How to Make Perfect Gluten Free Biscuits (Step-by-Step)
Baking the perfect Gluten Free Biscuits is all about temperature control and a gentle touch. Follow these 9 steps to ensure your Gluten Free Biscuits rise tall and stay buttery.
1. High Heat Prep
Preheat your oven to 450°F (232°C). A very hot oven is essential for gluten free biscuits it causes the moisture in the butter to evaporate instantly, creating those tiny air pockets that make them fluffy.
2. Whisk the Dry Base
In a large bowl, whisk together your gluten free flour, xanthan gum (if your blend doesn’t have it), baking powder, salt, and sugar. This ensures the leavening agents are evenly distributed so every biscuit rises the same way.
3. The “Freeze” Secret
Cut your butter into small cubes and pop them in the freezer for 10 minutes.
4. Cut in the Butter
Using a pastry cutter or a fork, cut the frozen butter into the flour until it resembles small, pea-sized crumbs. Avoid using your hands if possible, as the heat from your fingers will melt the butter.
5. Combine the Wet Ingredients
Whisk your egg into the buttermilk (this acts as the binder). Pour it into the dry mixture and stir until just combined. The dough will be sticky this is normal! Do not overmix, or you’ll lose that light texture.
6. Create the “Lamination” Layers
Sprinkle flour onto parchment paper, place the dough on top, and dust with more flour.
- The Pro-Tip: Fold the dough in half over itself twice. This simple “folding” technique creates the physical layers that allow the biscuit to be pulled apart once baked.
- Gently shape it into a round about 7 inches wide and 1 inch thick.
7. The “No-Twist” Cut
Use a 2 inch biscuit cutter or a mason jar lid.
- Crucial Rule: Press straight down and pull straight up. Do not twist! Twisting the cutter seals the edges of the dough, which prevents the Gluten Free Biscuits from rising.
- Reform the scraps gently to get about 12 biscuits total.
8. The Bake
Place the biscuits on a greased cast iron skillet (for crispy bottoms) or a baking sheet. Bake for 15–20 minutes. Start checking at the 15-minute mark; you’re looking for a beautiful golden brown top.
9. The Finishing Touch
As soon as they come out, brush the tops with melted butter. Serve them while they are steaming hot for the best “melt-in-your-mouth” experience!
5 Secrets to Perfect Gluten Free Biscuits
If you want those towering, bakery style Gluten Free Biscuits, it’s all in the details. Gluten free dough can be a bit finicky, but these five “pro secrets” will ensure yours come out light and airy every single time
1. Choose the Right Flour
Not all gluten free blends are interchangeable!
- The Top Pick: For the fluffiest, most consistent results, I recommend Pillsbury Gluten Free All-Purpose Flour.
- The Adjustment: If you are using other popular blends like Bob’s Red Mill, King Arthur, or Pamela’s, the absorbency might differ. If your dough feels too wet to handle, don’t be afraid to add a bit more flour usually up to 2 ½ cups total until it reaches the right consistency.
2. The “Spoon and Level” Method
Never scoop your flour directly from the bag with your measuring cup! This packs the flour down, and you’ll end up with way too much, leading to dense, “brick-like” Gluten Free Biscuits. Instead, spoon the flour into the cup and level it off with the back of a knife. This keeps the flour light and your biscuits airy.
3. Keep It Cold!
The secret to those beautiful flaky layers is temperature control.
- Keep your butter and buttermilk in the fridge until the very last second.
- Why? When cold butter hits that 450°F oven, it creates a burst of steam. That steam is what physically “lifts” the dough to create those fluffy pockets. If the butter is warm, it just melts, and the biscuit stays flat.
4. Ditch the Rolling Pin
It might be tempting to roll the dough out perfectly flat, but don’t do it! * The Technique: Use your hands to gently pat the dough into a round.
- Folding for Layers: Folding the dough over itself (like a letter) and hand-shaping it keeps the structure “tall and tender.” A rolling pin can be too heavy and crush the air pockets you worked so hard to create.
5. The “No-Twist” Rule
When you’re finally ready to cut your biscuits, press your cutter straight down and straight up. If you twist the cutter, you “pinch” the edges of the dough together, which seals them shut and prevents the biscuit from rising. Keep those edges open so they can grow!
Serving Ideas: How to Enjoy Your Gluten Free Biscuits
These Gluten Free Biscuits are so versatile they can go from a simple breakfast to a hearty dinner side in no time. Here are a few ways to serve them up:
- The Classic Morning: Split a warm biscuit and top with a thick swipe of salted butter and fruit jam. The sweetness against the buttery dough is pure bliss.
- The Cozy Side: Pair them with your favorite soups, stews, or a bowl of spicy chili. They are perfect for soaking up every last bit of broth!
- A Southern Staple: Go for a full Southern style breakfast by smothering them in sausage or mushroom gravy. Because these Gluten Free Biscuits are sturdy but soft, they hold up beautifully under the weight of a rich gravy without getting mushy.
FAQs About Gluten Free Biscuits
Q: Can I make Gluten Free Biscuits without xanthan gum?
A: Yes, if your flour blend already includes it (like Pillsbury). If not, don’t skip it , it helps hold the biscuits together.
Q: Can I freeze gluten free biscuits?
A: Absolutely! Bake, cool, and freeze in a sealed bag for up to 3 months. Reheat at 350°F until warm.
Q: How do I reheat Gluten Free Biscuits without drying out?
A: Wrap in foil and warm in the oven at 300°F for about 10 minutes.
See More gluten free Desserts :
Gluten Free Cheesecake | Easy, Creamy & Classic Recipe
Gluten Free Lemon Cookies (Soft, Bright & Not Dry)
Gluten Free Peanut Butter Cookies in 20 Min | Soft & Chewy
Better Than The Bakery! Super Fluffy Gluten Free Carrot Cake
Essential Baker’s Notes for Success
To ensure your Gluten Free Biscuits come out towering and tender every time, keep these specific “pro-tips” in mind. These small adjustments can be the difference between a good biscuit and a professional grade one.
1. The Flour Factor
Not all gluten free flours are created equal!
- The Gold Standard: For the fluffiest, most consistent results, I recommend Pillsbury Gluten Free All-Purpose Flour. It has the perfect weight for this specific recipe.
- Adjusting Other Blends: If you are using Bob’s Red Mill, King Arthur, or Pamela’s, you might notice the dough is a bit wetter. Don’t worry! Just add a little more flour (up to 2 ½ cups total) until the dough is manageable but still slightly tacky.
2. Temperature is Everything
- Stay Chilled: For those extra flaky, tall layers, your butter and buttermilk must be ice-cold.
- The Science: When cold butter hits a hot oven, it creates steam. That steam is what “lifts” the dough and creates the airy pockets we love. If your butter is too warm, it will just melt into the dough, leaving you with a flat, greasy biscuit.
3. How to Measure Correctiy
- The Fix: Use the “Spoon and Level” method. Spoon the flour into your measuring cup until it overflows, then level it off with the back of a knife. This ensures your biscuits stay light and airy, never dense or “sandy.”
4. Make Ahead & Freezing
- Prep for Later: These Gluten Free Biscuits are perfect for meal prep. Once they are baked and cooled, you can freeze them for up to 3 months.
- The Best Reheat: To keep that “fresh from the oven” texture, wrap a frozen biscuit in foil and heat it at 350°F (175°C) until warmed through. It tastes just as good as the day you made it!
Final Thoughts: Your New Breakfast Staple
These fluffy gluten free biscuits are proof that you don’t need gluten to enjoy bakery style comfort food. With just one flour blend, a few simple ingredients, and the right technique, you’ll have biscuits that are buttery, soft, and truly satisfying.
Whether you’re serving them alongside a hearty bowl of gravy, making a breakfast sandwich, or just enjoying one warm with a bit of jam, these will quickly become a staple in your kitchen. No more dense “rocks” for breakfast just pure, flaky joy. tag me on instagram.