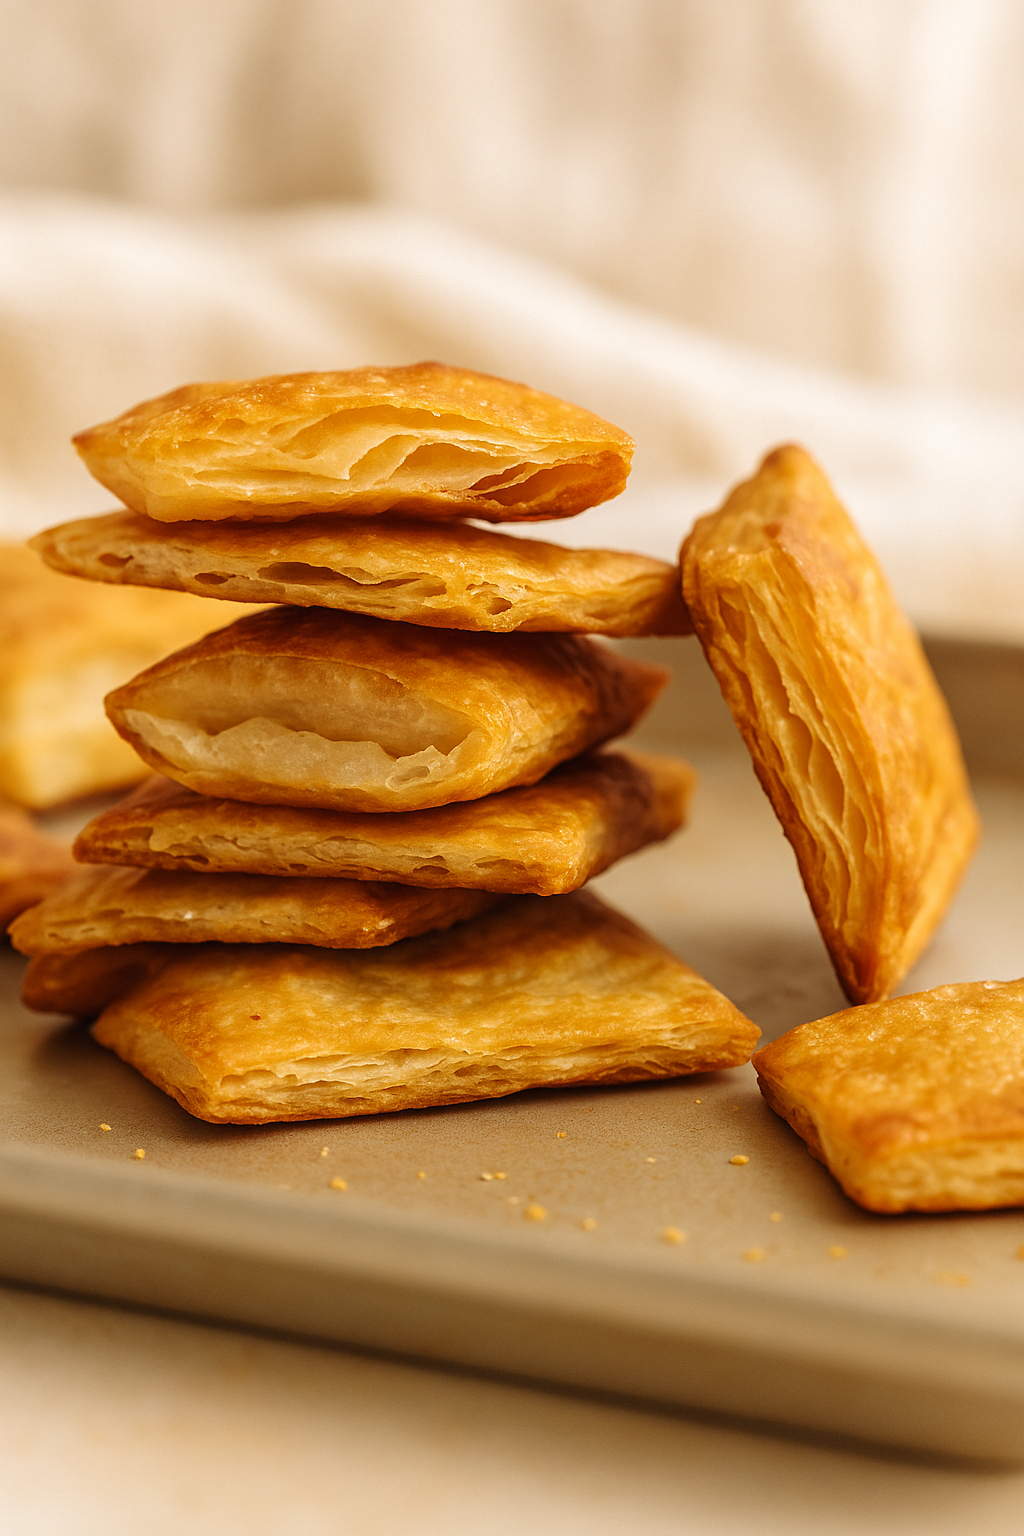
If you’ve ever tried making gluten free puff pastry and ended up with something flat, crumbly, or dry, this recipe will change that story.
It’s buttery, airy, and full of delicate layers, the kind of pastry that truly puffs.
We’ll do it the Gf Snack way: clear steps, honest ingredients, and calm confidence. By the end, you’ll have a dough that looks and feels like the real thing, ready for turnovers, pies, or savory tarts.

Why You’ll Love This Gluten Free Puff Pastry
- Buttery layers that actually rise beautifully in the oven
- No special equipment or complicated folding, just patience and chill time
- Freezes well for future baking projects
- 100% gluten-free, with a simple dairy-free option
- Crisp edges, tender bite, and that bakery-style aroma you’ll love
Key Ingredients & The Science Behind Them
Gluten-Free All-Purpose Flour Blend:
Choose a high-quality 1:1 flour (like Bob’s Red Mill or King Arthur Measure-for-Measure). The blend provides structure and helps the dough stay elastic during folds.
Xanthan Gum:
If your flour blend doesn’t contain it, add a teaspoon. It mimics gluten’s stretch, holding your flaky layers together.
Cold Butter:
This is the magic behind puff pastry. As butter melts in the oven, it releases steam, creating the signature “puff.” Keep it cold at all times. You’ll use butter twice: cubes for the base dough, and thin slices for the lamination folds.
Cold Water:
Hydrates the dough while keeping everything cool and easy to handle. If your kitchen is warm, use ice water.
Pro Tip: Chill everything, flour, water, butter, even your rolling pin. Cold ingredients mean flaky pastry.
Step by Step Instructions (with Folding Guide)
1. Make the Base Dough (Détrempe)
In a large bowl, whisk together:
- 2 cups gluten-free flour blend
- 1 teaspoon xanthan gum (if needed)
- 1 tablespoon sugar
- 1 teaspoon salt
Add 3 tablespoons cold butter (cubed) and cut it in using your fingertips or a pastry cutter until the mixture resembles coarse crumbs.
Slowly pour in ½ cup cold water, stirring with a fork until the dough just comes together.
Form into a smooth ball, flatten into a rectangle, wrap, and refrigerate for 30 minutes.
2. Laminate the Dough (Create Layers)
Unwrap your chilled dough and roll it out on a floured surface into a ¼-inch-thick rectangle.
Lay ⅔ cup cold butter (thinly sliced) over two-thirds of the dough.
Fold the unbuttered third over the middle third, then fold the remaining third on top, like folding a letter.
Rotate the dough 90°, roll it out again, and repeat the folding process once more.
You now have six buttery layers!
Wrap tightly and chill for another 30 minutes before shaping.
3. Ready to Bake or Freeze
After chilling, your puff pastry is ready to cut and bake into any shape you like, squares, twists, or turnovers.
Chef’s Note: If your butter starts to soften during folds, pop the dough into the fridge for 10 minutes to re-chill before continuing.

Chef’s Tips for Perfect Gluten Free Puff Pastry
- Stay cool: Warm butter melts too fast and ruins the layers.
- Don’t over-knead: Gluten-free dough doesn’t need tough handling.
- Use light pressure: Gentle rolling keeps those layers intact.
- Rest time is key: The fridge is your secret weapon — it helps the dough relax and puff beautifully.
Recipe Variations
Dairy-Free Version:
Swap butter with a solid vegan block butter (avoid spreads).
Savory Puff:
Add dried herbs like thyme or rosemary before the final fold.
Sweet Puff:
Dust cinnamon sugar between layers or brush the top with maple syrup before baking.
Storage & Freezing
- Refrigerate: Up to 3 days, tightly wrapped.
- Freeze: Up to 1 month. Thaw overnight in the fridge before rolling and baking.
Frequently Asked Questions
Can I make this without xanthan gum?
Yes, if your flour blend already includes it, otherwise, your dough may crack during folding.
Why didn’t my pastry puff properly?
Usually, the butter got too warm or the dough wasn’t chilled enough between folds. Keep everything cold.
Which flour works best?
A blend designed for baking (with rice flour, potato starch, and tapioca) gives the best texture.
Can I make it ahead?
Yes, prepare it a day in advance and store it in the fridge until you’re ready to bake.

See More Gluten Free Baking Recipes you will love :
Gluten Free Sourdough Bread Recipe (Step by Step Guide)
Soft & Easy Gluten Free Bread Recipe | 7 Simple Steps
Gluten Free Pumpkin Bread | Cozy Fall Baking Made Simple
Soft Gluten Free Pretzels (Bakery Style at Home)
Gluten Free Buns | Soft, Fluffy & Ready in 45 Minutes
Conclusion
And there you have it, a buttery, flaky gluten free puff pastry that truly rises to the occasion.
With a little patience and a few simple folds, you’ve turned basic ingredients into layers of golden, crisp perfection.
Keep a batch in your freezer for whenever inspiration strikes, sweet or savory, breakfast or dessert.
Every time you roll it out, remember: gluten free baking doesn’t have to feel complicated. It can be calm, joyful, and beautifully rewarding.