Making gluten free bread at home can feel intimidating.
Too dense. Too dry. Or worse, it looks good but completely falls apart once sliced.
If you’ve ever searched for a gluten free bread recipe that actually works, you’re not alone.
This easy gluten free bread recipe is soft inside, lightly golden on the outside, and made with simple ingredients you can trust. No complicated techniques, no strange textures, and no stress. Just a reliable loaf you can slice, toast, and enjoy every day.
Whether you’re baking for celiac safety, gluten sensitivity, or simply want a dependable homemade option, this recipe is designed to give you confidence, and consistent results.
")
Why This Gluten Free Bread Recipe Works
- Soft crumb (not dry or gummy)
- No kneading required
- Beginner friendly method
- Tested with gluten free flour blends
- Perfect for sandwiches & toast
Key Ingredients for Gluten Free Bread (And Why They Matter)
Choosing the right ingredients is the difference between soft, sliceable gluten free bread and a loaf that turns dense or crumbly. Here’s exactly why each ingredient matters in this recipe:
Gluten Free Bread Flour
A high quality gluten free bread flour blend is the foundation of this recipe.
Unlike all-purpose gluten-free flours, bread blends are designed to support yeast and structure. They often include starches and binders that help trap air, giving the bread a better rise and a more bread-like crumb.
Tip: Flour blends made specifically for bread (like Schär Mix B or similar) produce more reliable results than pastry blends.
Gluten-Free Yeast
Yeast is responsible for fermentation and rise. In gluten-free baking, yeast still creates air, but it needs the right flour structure to hold it in.
Using certified gluten free yeast ensures safety for celiac diets and consistent fermentation without off-flavors.
Warm Water
Water hydrates the flour and activates the yeast.
Gluten-free flours absorb more liquid than wheat flour, which is why this dough is softer and wetter than traditional bread dough.
If the dough looks sticky, that’s a good sign, it means the starches are properly hydrated.
Olive Oil
Olive oil adds moisture and tenderness to gluten-free bread, helping prevent dryness after baking. It also improves mouthfeel and keeps the crumb soft for longer, especially important since gluten-free bread tends to stale faster.
Sugar
Sugar feeds the yeast and supports fermentation.
It also helps with light browning in the oven, giving the loaf a more appealing golden color.
Salt
Salt strengthens structure, balances flavor, and controls yeast activity.
Without enough salt, gluten-free bread can taste flat and rise unevenly.
Why This Ingredient Balance Works
Gluten-free bread doesn’t rely on gluten for structure. Instead, it depends on hydration, fat, and proper fermentation. This ingredient combination is designed to work together, creating a loaf that’s soft, stable, and easy to slice once cooled.
Step-by-Step: How to Make Gluten Free Bread at Home
This method is designed for reliable gluten free bread with a soft crumb. Follow the steps in order and trust the texture cues, they matter more than looks.
1. Activate the Yeast
In a small bowl, combine the warm water, sugar, and gluten free yeast.
Stir gently and let it rest for 5–10 minutes.
What to look for:
- A light foam or bubbles on the surface
- A mild yeasty smell
If nothing happens, the water may be too hot or too cold.
2. Mix the Dry Ingredients
In a large bowl, add the gluten free bread flour and salt.
Whisk or stir well so the salt is evenly distributed.
This step helps ensure even flavor and consistent rise.
3. Combine Wet and Dry Ingredients
Pour the activated yeast mixture and olive oil into the flour.
Mix using a spoon or stand mixer until fully combined.
Texture check (very important):
- The dough should be thick, sticky, and smooth
- It should look more like very thick cake batter, not kneadable dough
Gluten free bread dough is always wetter than wheat dough.
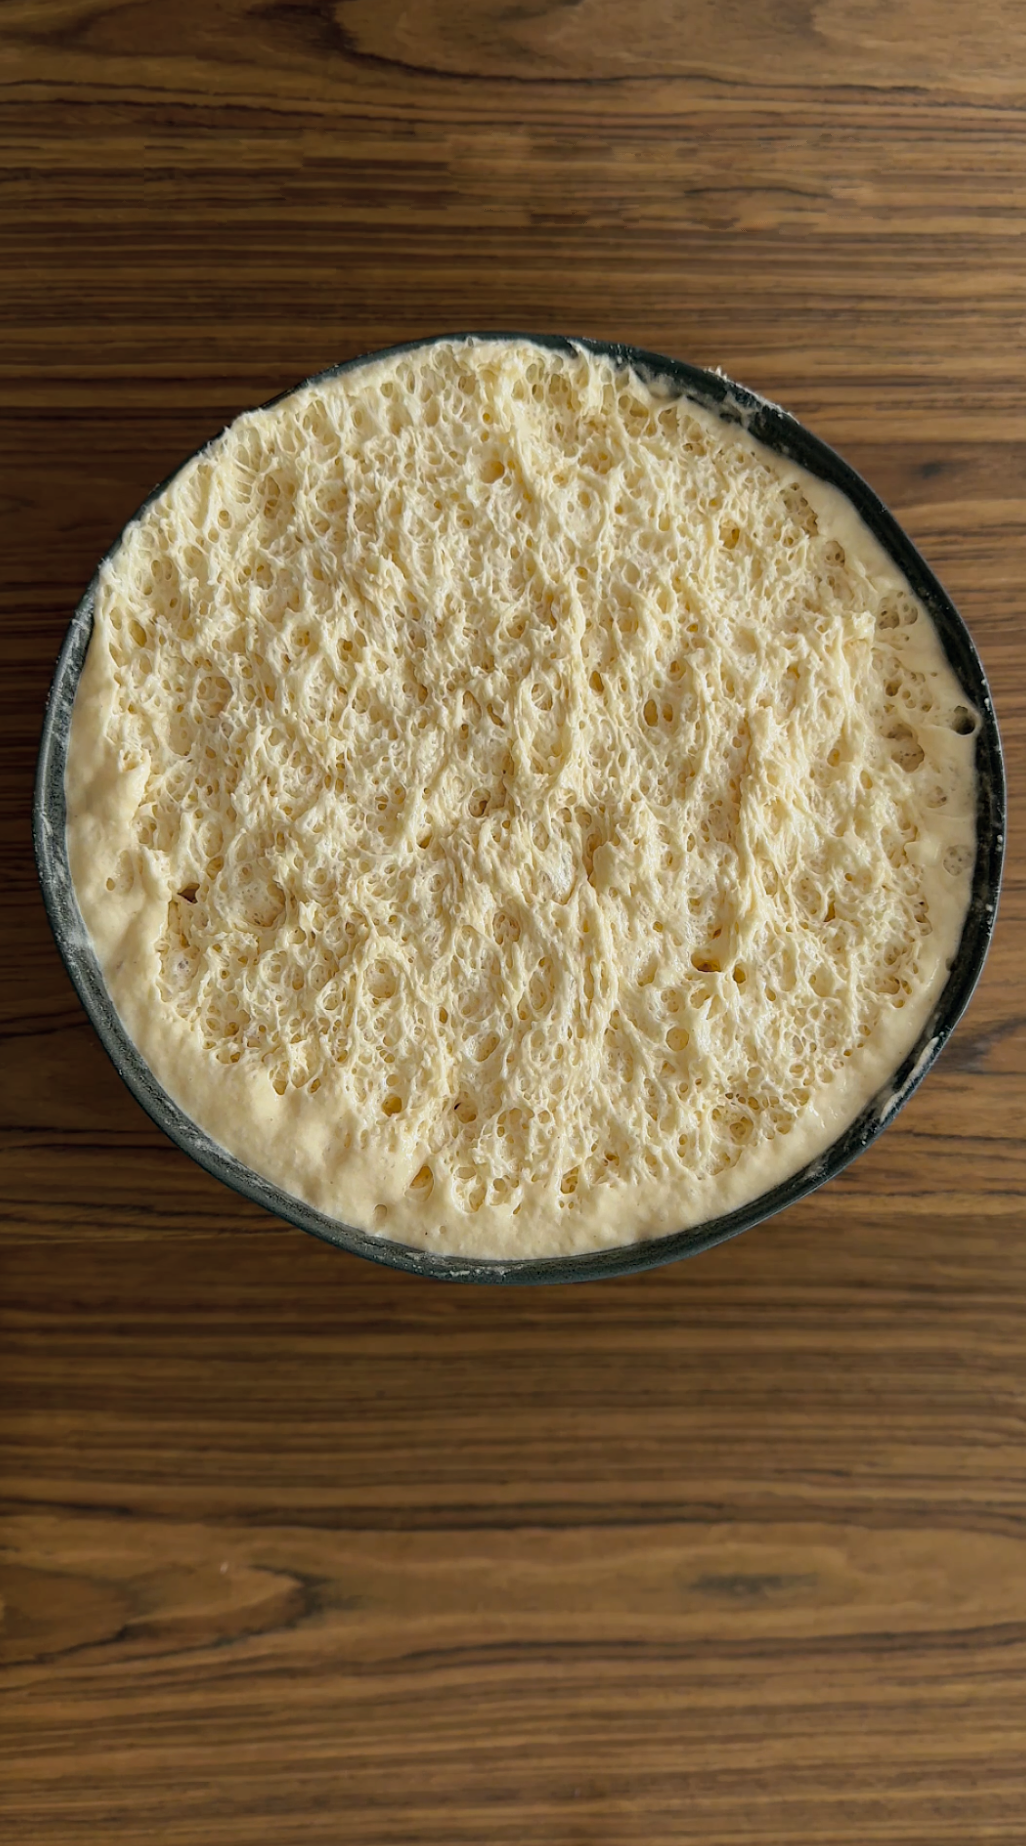
4. First Rise (Structure-Building Stage)
Cover the bowl with a clean towel or plastic wrap.
Place it in a warm, draft free spot for 45–60 minutes.
What happens here:
- The flour hydrates
- The yeast creates air pockets
- The structure slowly develops
The dough will puff slightly, it will not double in size.
")
5. Transfer to the Pan
Line or lightly oil a loaf pan.
Spoon the dough into the pan and smooth the top with wet hands or a spatula.
This shaping step is important because gluten-free dough won’t shape itself during baking.
6. Second Short Rest
Let the dough rest in the pan for 20 minutes while the oven preheats.
This final rest improves crumb texture and oven spring.
7. Bake Until Set
Bake in a preheated oven at 180°C (350°F) for 40–45 minutes.
How to know it’s done:
- Top is lightly golden
- Loaf feels firm when gently pressed
- Sounds slightly hollow when tapped
8. Cool Completely Before Slicing
Remove the bread from the pan and place it on a wire rack.
Let it cool at least 1 hour before cutting.
This step is essential, gluten free bread continues to set as it cools.
Why This Method Works
Gluten free bread depends on hydration, time, and gentle handling rather than kneading.
Each rest stage allows the flour to absorb liquid and the yeast to work without collapsing the structure.
Common Mistakes When Baking Gluten Free Bread
Even a good gluten free bread recipe can fail if a few key details are missed. These are the most common mistakes — and how to avoid them — so your bread turns out soft, stable, and sliceable every time.
1. Using the Wrong Gluten Free Flour
Not all gluten free flours are suitable for yeast bread.
Why this causes problems:
Pastry or cake style gluten free blends don’t have enough structure to support fermentation. This leads to bread that collapses or turns dense.
What to do instead:
Use a gluten free bread flour blend or an all-purpose blend designed for yeast baking (with binders like psyllium or xanthan gum).
2. Expecting Gluten-Free Dough to Look Like Wheat Dough
Gluten free dough behaves differently.
Why this causes problems:
If you add extra flour to “fix” a sticky dough, the bread will bake up dry and heavy.
What to do instead:
The dough should be wet, sticky, and thick, closer to batter than traditional dough. This is normal and necessary.
3. Skipping the Resting Time
Resting is not optional in gluten-free baking.
Why this causes problems:
Without enough time, the flour doesn’t fully hydrate and the structure stays weak.
What to do instead:
Allow the full resting and rising times. This gives the starches time to absorb liquid and creates a better crumb.
4. Water That’s Too Hot or Too Cold
Yeast is sensitive.
Why this causes problems:
- Water that’s too hot kills the yeast
- Water that’s too cold doesn’t activate it
Both result in poor rise.
What to do instead:
Use warm water (lukewarm to the touch), around body temperature.
5. Cutting the Bread While It’s Hot
This is one of the most common mistakes.
Why this causes problems:
Gluten free bread continues to set as it cools. Cutting too soon traps steam and makes the crumb gummy.
What to do instead:
Let the bread cool at least 1 hour before slicing.
6. Overbaking or Underbaking
Timing matters more with gluten-free bread.
Why this causes problems:
- Underbaked bread collapses in the center
- Overbaked bread dries out quickly
What to do instead:
Bake until the loaf is firm, lightly golden, and sounds hollow when tapped.
7. Storing Gluten Free Bread Incorrectly
Gluten free bread stales faster than wheat bread.
Why this causes problems:
Leaving it uncovered or refrigerating it dries it out.
What to do instead:
Store at room temperature for short-term use, or slice and freeze for longer storage.
Why Avoiding These Mistakes Matters
Gluten free bread relies on hydration, structure, and timing, not kneading.
When these basics are respected, the result is bread that feels reliable, calm, and satisfying to make.
")
Gluten Free Bread FAQ (SEO Gold)
This section targets real search questions people type into Google. Short, clear answers help readers and improve your chances of ranking in featured snippets.
Is gluten free bread really supposed to be so wet?
Yes, gluten free bread dough is naturally wetter than wheat dough.
This extra hydration allows the starches and binders to absorb liquid properly, which is essential for a soft crumb. Adding more flour to “fix” stickiness usually results in dry, dense bread.
Why didn’t my gluten-free bread rise?
The most common reasons are:
- Inactive or expired yeast
- Water that was too hot or too cold
- Using a flour blend not suitable for yeast bread
Gluten free bread will rise less dramatically than wheat bread, but it should still puff slightly during resting and baking.
Can I use any gluten free flour for bread?
Not all gluten-free flours work for yeast bread.
For best results, use a gluten free bread flour blend or an all-purpose blend designed for yeast baking and structure. Pastry or cake blends are better suited for cookies and cakes, not bread.
Why is my gluten free bread gummy inside?
Gummy texture usually means one of three things:
- The bread was sliced before fully cooling
- The bread was underbaked
- The dough didn’t rest long enough before baking
Gluten-free bread continues to set as it cools, so patience is key.
Should gluten free bread double in size?
No.
Unlike wheat dough, gluten free bread does not double during rising. A modest increase in volume is normal and expected. Most of the final lift happens in the oven.
Can I make gluten free bread without kneading?
Yes, and that’s actually preferred.
Gluten-free bread relies on mixing, hydration, and resting, not kneading. Overworking the dough won’t improve structure and can lead to uneven texture.
See more baking recipes :
Gluten Free Baked Donuts (Soft, Easy & No Frying Required)
Gluten Free Bagels Recipe | Soft, Chewy & Golden
Easy Gluten Free Focaccia Bread (Soft, Olive Oil & Foolproof)
No-Knead Gluten Free Lentil Bread Rolls (Soft, Easy & Nourishing)
Easy Gluten Free Naan Bread (Soft, Bendy & Delicious!)
Recipe Notes (Important Before You Start)
These notes may look small, but they make a big difference in gluten free bread success. Reading them first helps you avoid the most common frustrations.
Dough Texture Is the Key
This gluten-free bread dough should be soft, sticky, and wet, closer to thick batter than traditional dough.
If it looks too loose, give it a few minutes to hydrate before adjusting anything. Gluten free flours absorb liquid slowly.
Do not add extra flour too quickly, or the bread may turn out dry.
Flour Choice Matters
This recipe is written for a gluten free bread flour blend, not a pastry or cake blend.
If you use a different brand, results may vary slightly in rise and crumb, but the method stays the same.
Yeast Activity Can Change With Temperature
If your kitchen is cool, the dough may need a bit more resting time.
If your kitchen is warm, the rise may happen faster.
There’s no rush, gluten free bread benefits from calm, steady fermentation.
Always Use a Scale if Possible
Gluten free baking is more sensitive to measurement errors.
Using a kitchen scale gives more consistent results than cups, especially for flour and water.
Baking Time May Vary Slightly
Every oven behaves differently.
If your bread is browning too quickly, loosely cover the top with foil for the last 10 minutes.
It’s better to bake gluten free bread slightly longer than to underbake it.
Cooling Is Not Optional
Gluten free bread continues to set as it cools.
Cutting too early can cause a gummy center, even if the bread is fully baked.
Let it cool completely before slicing, this is essential.
This Bread Improves After a Few Hours
The texture often becomes even better after a few hours at room temperature.
Many gluten free breads slice more cleanly once fully set.
Conclusion
Baking gluten free bread at home doesn’t need to feel overwhelming or uncertain. With the right ingredients, proper hydration, and a calm, patient method, you can create a loaf that’s soft, reliable, and genuinely enjoyable to eat.
This recipe is designed to work with gluten-free ingredients, not against them. Instead of forcing traditional bread techniques, it respects how gluten-free flour behaves, allowing time and moisture to do the heavy lifting. The result is bread you can slice, toast, and share with confidence.
Whether you’re baking for medical reasons or personal comfort, this gluten-free bread proves that safe food can also be beautiful and satisfying. Take your time, trust the process, and enjoy the quiet pride that comes from making something that truly works.
If you try this recipe, let it become a base you return to, one that brings ease back into your kitchen, one loaf at a time. Don’t forget to tag me on instagram.