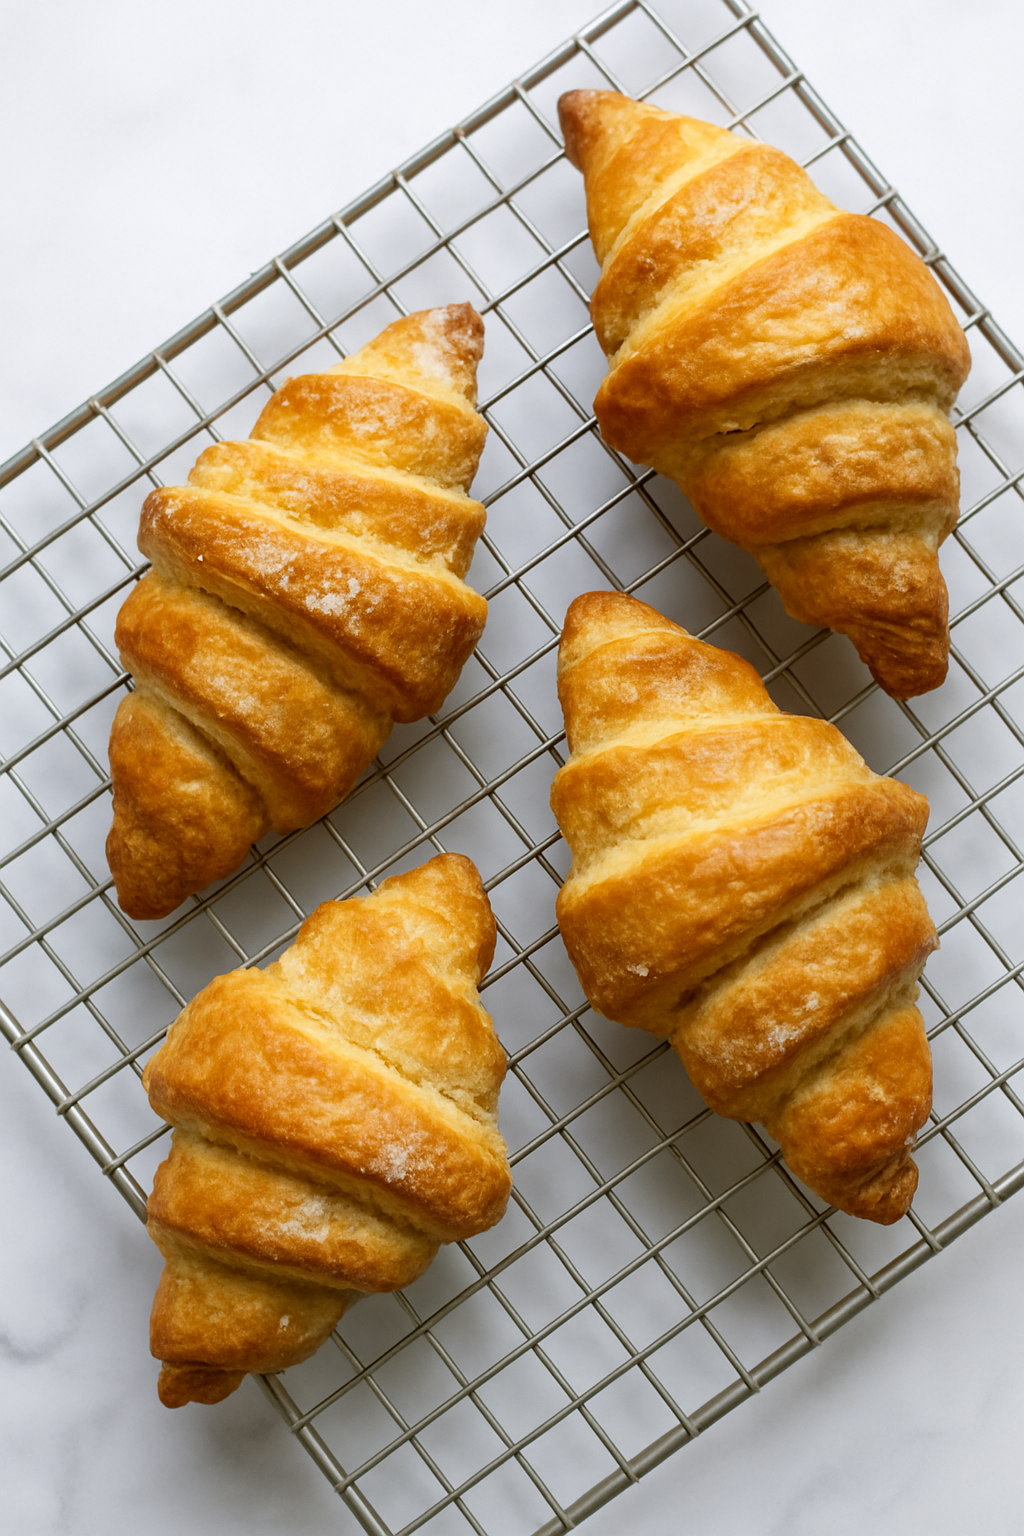
- These homemade gluten free croissants are buttery, flaky, and bakery style delicious! Learn the step by step method for laminating gluten free dough, plus tips for making them dairy free or chocolate filled.
The Golden, Flaky Reality Let’s be honest most “gluten free croissant” recipes are a heartbreak. You spend hours in the kitchen craving that shattered glass crunch of a French pastry, only to pull something out of the oven that looks (and tastes) like a dense dinner roll.
This recipe showcases the meticulous process of creating a gluten free croissant that rivals its traditional counterpart. By incorporating a carefully curated blend of gluten-free flours and a precise lamination technique, these Gluten Free Croissants achieve an exquisite texture and flavor profile. The result is a delightful pastry that combines a crisp exterior with a tender, airy interior, embodying the essence of classic French baking. Enjoy this indulgent treat without compromise on taste or quality, transforming your gluten free experience into a culinary triumph.
Why This Recipe Works Replicating a traditional pâte feuilletée without gluten isn’t just about luck it’s about science. In this guide, I’m sharing the exact techniques for chilling, folding, and choosing the right high quality flour blend to ensure your dough actually holds those beautiful layers. Whether you’re a seasoned baker or tackling your first batch of homemade gluten free pastry, these tips will give you a golden crust and a taste that is truly heavenly.

Why This is the Only Gluten Free Croissant Recipe You’ll Need
- Authentic Lamination (No “Bread” Texture): Forget those dense, cakey imitations. By using a specific chilling and folding technique, we create genuine butter layers that puff in the oven. You’ll get that “shattering” crunch on the outside and a light, airy honeycomb inside that rivals any boutique bakery.
- Tested & Versatile: I’ve tested this dough in multiple environments to ensure it holds up. It’s incredibly adaptable, whether you need to swap in vegan butter for a dairy free croissant or want to tuck in some high quality dark chocolate for a pain au chocolat, the structural integrity stays perfect.
- The “Bake-From-Frozen” Hack: Life is busy, and gluten free dough can be finicky. I’ve perfected the freezing method so you can shape your batch on a weekend, freeze them, and pop a single GF croissant in the oven on a Tuesday morning. It makes your kitchen smell like a French boulangerie with zero morning effort.
The Secret to Perfect Gluten Free Croissants Layers: Key Ingredients
Don’t let the list intimidate you, every ingredient here has a specific job in mimicking the chemistry of wheat. Here is what you’ll need to get those professional results at home:
- The Flour Base (405g): Use a high-quality Gluten-Free All-Purpose Blend (I prefer blends that include rice flour and potato starch). Pro Tip: If your blend already contains xanthan gum, that’s fine, but the real magic comes from the next ingredient.
- The “Gluten” Mimic (Psyllium Husk Powder): This is my “secret weapon.” 12g of psyllium husk gives the dough the elasticity needed to roll and fold without it snapping or crumbling. It’s the difference between a croissant and a biscuit.
- Double Leavening: We use both Quick Rise Yeast and Baking Powder. The yeast provides that fermented flavor and “lift,” while the baking powder ensures the layers stay separated and airy during the initial oven spring.
- The Lamination Butter (6 oz): Whether you use unsalted dairy butter or a high-fat vegan butter sticks (like Miyoko’s or Violife in the US), make sure it is softened but still cool to the touch. If it’s too oily, your layers will melt together!
- The Chocolate (Optional but Recommended): For a true pain au chocolat experience, use chopped high-quality bittersweet chocolate bars rather than chips. Chips are designed to hold their shape; we want the chocolate to melt into the layers.
- The Finishing Touch: A simple Egg Wash (or melted dairy-free butter) is what gives these that “French Bakery” mahogany glow.
How to Make Gluten Free Croissants: Step by Step
Step 1: The Butter Block (The Engine of the Flake)
Place your softened butter between two sheets of parchment paper. Roll it into an 8×6-inch rectangle.
- Real Experience Tip: You want the butter to be “pliable like cold play-dough.” If it snaps when you bend the parchment, it’s too cold. If it’s oily, pop it in the fridge for 5 minutes. Consistency is everything here!
Step 2: Mixing the “Elastic” Dough
Whisk your flour, yeast, sugar, salt, baking powder, and psyllium husk in a large bowl. Separately, mix the melted butter into the warm water, then gradually combine.
- The Feel: Knead lightly until it forms a smooth ball. It should feel slightly tacky but not stick to your hands. If it feels crumbly, add one tablespoon of warm water at a time.
Step 3: The Butter Enclosure (The Lock-In)
Roll your dough into a 14×10-inch rectangle. Place your butter block on the lower half, fold the top half over, and pinch the edges firmly to seal.
Step 4: Lamination & The “Letter Fold”
Roll the dough into a 16×10-inch rectangle. Fold it like a business letter: top third down, bottom third up. Rotate 90 degrees and repeat.
- Pro Tip: If you see the butter starting to poke through or “marbling,” stop immediately and chill the dough for 20 minutes. You want distinct layers, not a blended dough! Aim for 3 full turns (folds).
Step 5: Shaping Your Pastries
Roll the chilled dough into a long 10×25-inch rectangle.
- For Classic Croissants: Cut long, skinny triangles. Stretch the “tail” slightly, then roll tightly from the base to the tip.
- For Pain au Chocolat: Cut into 3×6-inch rectangles, place your high-quality chocolate at one end, and roll up. Ensure the seam side is down so they don’t unroll in the oven!
Step 6: The Proof (Patience is Key)
Cover loosely with plastic wrap. Let them rise in a warm, draft-free spot for about 1 hour.
- What to look for: They won’t double in size like wheat bread, but they should look “puffy” and feel like a marshmallow when lightly touched.
Step 7: The Bake & The Glow
Preheat your oven to 400°F (200°C). Brush generously with your egg wash for that deep mahogany color. Bake for 35–40 minutes.
The Hard Part: Let them cool on a wire rack for at least 20 minutes. Cutting into a hot gluten-free croissant can make the center feel gummy—the steam needs time to set the layers!
Pro Tips for Perfect Gluten Free Croissants
Keep it cold: The butter must stay solid during laminating for flaky layers. Chill whenever needed.
Dust lightly: Use just enough flour to prevent sticking, but not so much it toughens the dough.
Don’t rush proofing: Give the croissants time to rise, it makes a big difference in texture.
Variations You’ll Love For Gluten Free Croissant Recipe
- Chocolate Croissants (Pain au Chocolat): Tuck chocolate inside before rolling.
- Almond Croissants: Fill with almond paste or top with sliced almonds.
- Dairy Free Option: Swap butter and milk with dairy-free versions.
Try more gluten free Baking recipes :
Soft & Easy Gluten Free Bread Recipe | 7 Simple Steps
Gluten Free Bagels Recipe | Soft, Chewy & Golden
Gluten Free English Muffins (Soft, Fluffy & Homemade!)
Frequently Asked Questions (FAQ)
Can I freeze gluten free croissants?
Yes, and it’s a total game changer! After you have shaped your croissants (Step 5), wrap them individually in plastic wrap and store them in a freezer-safe bag for up to 2 months.
- To Bake: Thaw them in the fridge overnight or on the counter for 2 hours. Once they reach room temperature, let them proof in a warm spot until puffy, then bake as directed. This ensures you have “fresh-from-the-bakery” flavor on a busy weekday.
Do I really need xanthan gum for gluten free croissants?
If your gluten free flour blend already contains xanthan gum, you don’t need to add more. However, the psyllium husk powder in this recipe is non-negotiable. While xanthan gum helps with binding, psyllium husk provides the structural “stretch” needed for lamination. Without it, your dough will likely snap and crack when you try to fold in the butter.
Can I make the dough ahead of time?
Absolutely. In fact, many bakers find the dough easier to handle after a long chill. You can store the dough in the refrigerator for up to 24 hours after the first few folds. This slow fermentation actually improves the flavor! Just make sure it is wrapped tightly so it doesn’t develop a “skin” in the fridge.
Why did my butter leak out during baking?
This is the most common issue with homemade GF croissants. It usually happens if the oven wasn’t hot enough or if the dough wasn’t chilled properly between folds. If the butter melts before the pastry “sets,” it will pool on the pan. Always ensure your oven is fully preheated to 400°F before the tray goes in!
Notes for the Perfect Bake
1. The Temperature Rule (The 65°F / 18°C Rule)
The biggest secret to gluten-free lamination is keeping your kitchen cool. If your kitchen is over 75°F, the butter will melt into the dough instead of staying in layers.
- Real Experience: If you feel the dough getting “sweaty” or soft, don’t rush! Pop the entire tray into the fridge for 15 minutes before your next fold. Patience is the ingredient that creates the flake.
2. Choosing Your Flour Blend
In the USA, not all “1-to-1” flours are created equal.
- The Recommendation: For this recipe, a blend with Rice Flour and Potato Starch works best. I recommend brands like King Arthur Measure for Measure or Bob’s Red Mill. Avoid blends that are heavy on bean flour (like chickpea), as they can leave a “grassy” aftertaste in a delicate pastry.
3. Don’t Skip the Psyllium Husk
You might be tempted to use extra Xanthan Gum instead of Psyllium Husk. Don’t!
- Why it matters: Psyllium husk creates a “gel” that mimics gluten’s elasticity. It allows you to roll the dough thin without it snapping. If you use only Xanthan, your croissants may turn out more like shortbread than flaky pastry.
4. Storage & Reheating (The “Next Day” Strategy)
Gluten-free pastries are notorious for drying out quickly.
- The Fix: Store leftovers in an airtight container for up to 2 days. To get that “shatter-crunch” back, never use a microwave. Reheat them in a toaster oven or air fryer at 350°F (175°C) for 3–5 minutes. They will taste brand new!
Final Thoughts
This conclusion is warm and inviting, but for a USA-based audience, we can optimize it to drive more engagement (comments) and SEO authority.
In the US, “foodie” culture loves to share photos and “save” recipes, so we should add a call to action for social media and a final “Success Tip.”
Final Thoughts: Your Bakery-Standard Success
There is honestly no feeling quite like pulling a tray of golden, buttery gluten-free croissants out of your own oven. When you hear that first “crunch” and see the steam rising from those perfect layers, you’ll realize that “bakery magic” is finally possible in a gluten-free kitchen.
I Want to See Your Creations!
I’ve spent a lot of time perfecting this lamination technique, and nothing makes me happier than seeing it work for you. If you try this recipe, please leave a comment below and let me know:
- Did you stick with the Classic French Croissant, or did you go for the Dark Chocolate (Pain au Chocolat) version?
- The “Crunch” Test: Tag me in your photos or videos on Instagram/youtube using #GFsnack, I love seeing those flaky cross sections!
Now you can finally stop searching for the “perfect” store bought version and enjoy your own homemade gluten free pastries anytime, crisp, buttery, and 100% gluten free.
Happy baking, and enjoy every single flaky bite!